For Functions components, you must also add the environment variables to the component’s project.yml configuration file. If you configured a source directory for the component, place the project.yml file in that directory. Otherwise, place it in the repository root.
How to Manage Functions in App Platform
Last verified 7 Apr 2026
App Platform is a fully managed Platform-as-a-Service (PaaS) that deploys applications from Git repositories or container images. It automatically builds, deploys, and scales components while handling all underlying infrastructure.
Functions are blocks of code that run on demand without requiring you to provision or manage servers. You can develop on your local machine, test your code from the command line using doctl, then deploy to App Platform without managing the underlying servers.
Add a Function to an App Using Automation
You can add a function to an app using the CLI’s app update command or the API’s app update endpoint. To add a function, update the app spec with the function’s specifications and submit the spec using the following command or endpoint.
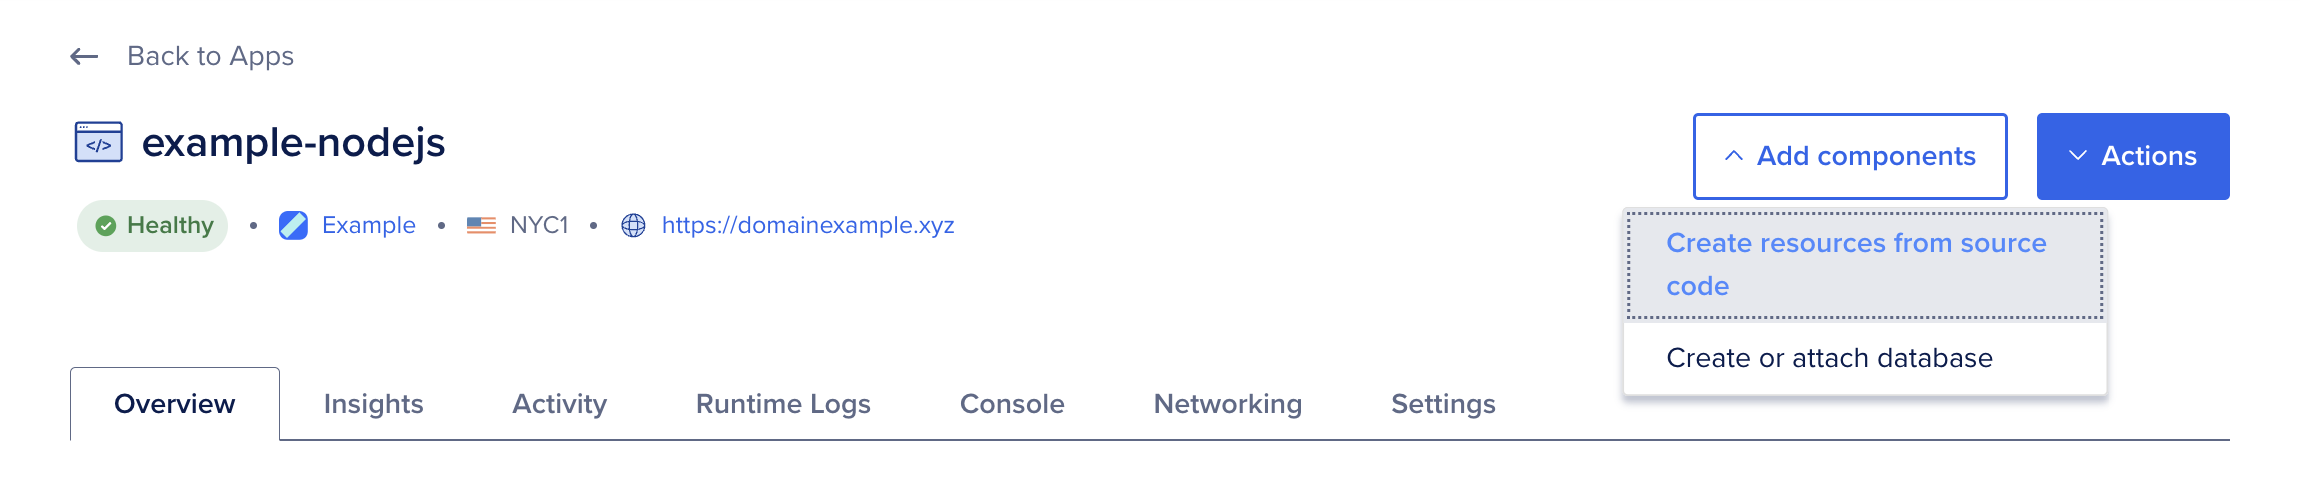
Add a Function to an App Using the Control Panel
Go to the Apps page of the DigitalOcean Control Panel and select your app. Click Add components, then choose Create resources from source code to add a Function.
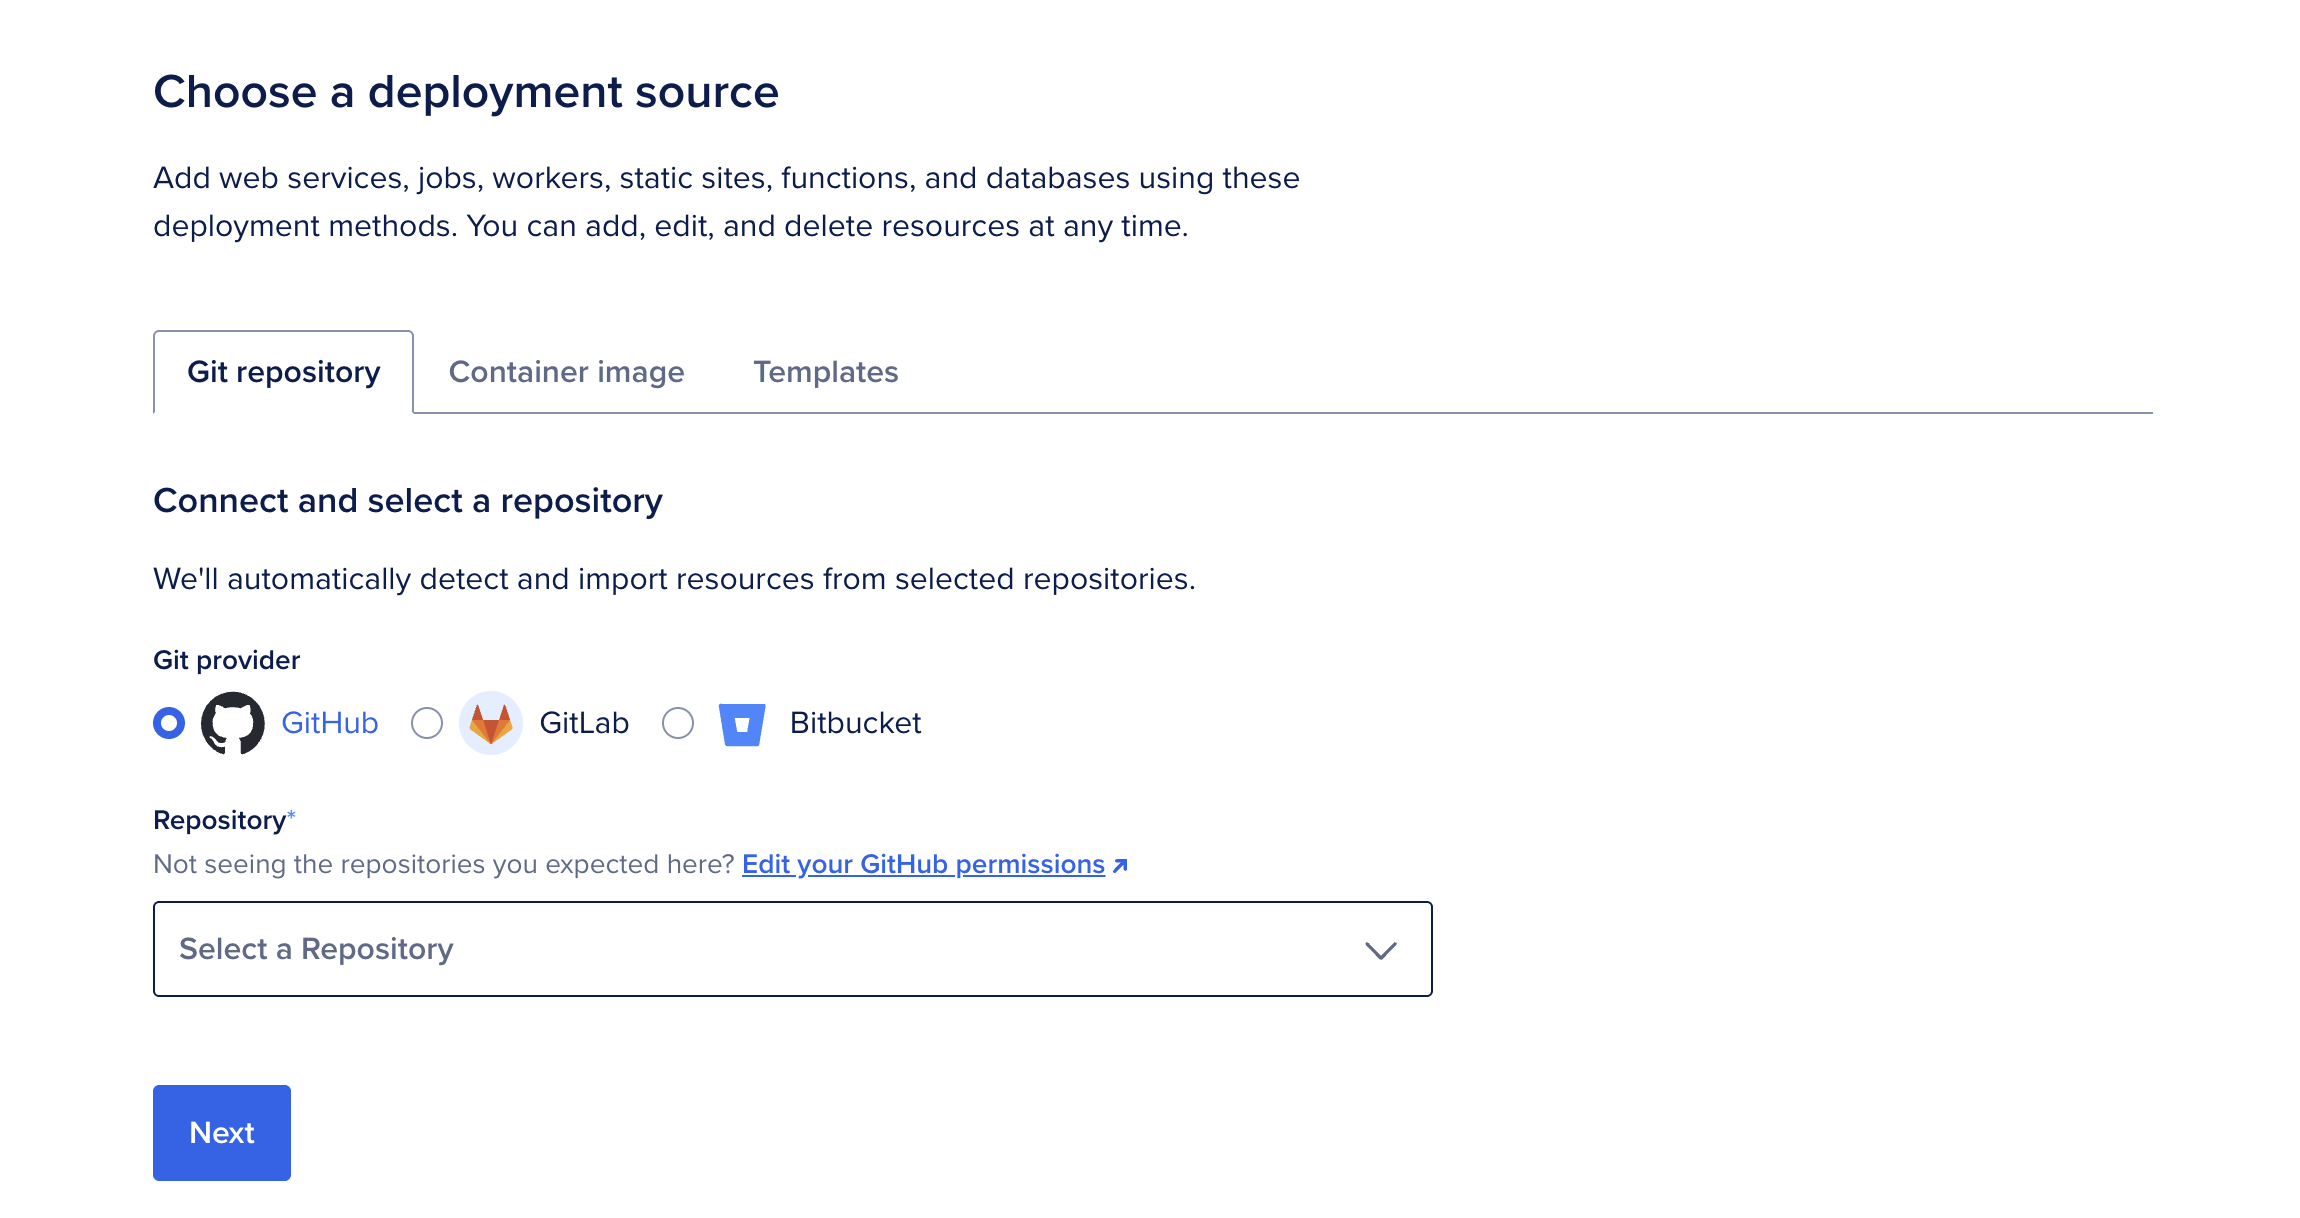
On the Add resources screen:
- Select your deployment source, either a Git repository or a container image. If you have not previously created an app on App Platform, the repository service may prompt you to provide DigitalOcean with read permissions to your account.
- If using a Git repository, choose a branch to deploy from. By default, App Platform builds from the repository’s root. If your code lives in a subdirectory (for example, in a monorepo), set the source directory to match.
- Clear the Autodeploy checkbox if you want to stop automatic redeploys when the repository changes.
- Click Next.
App Platform retrieves your code, analyzes your repository, and automatically selects the appropriate runtime (such as Node or Ruby). If you need to override this behavior, upload a Dockerfile to your branch and restart the creation process.
Configure Resource Settings
The Resource settings table displays the configuration settings, some of which the detection system auto-fills.
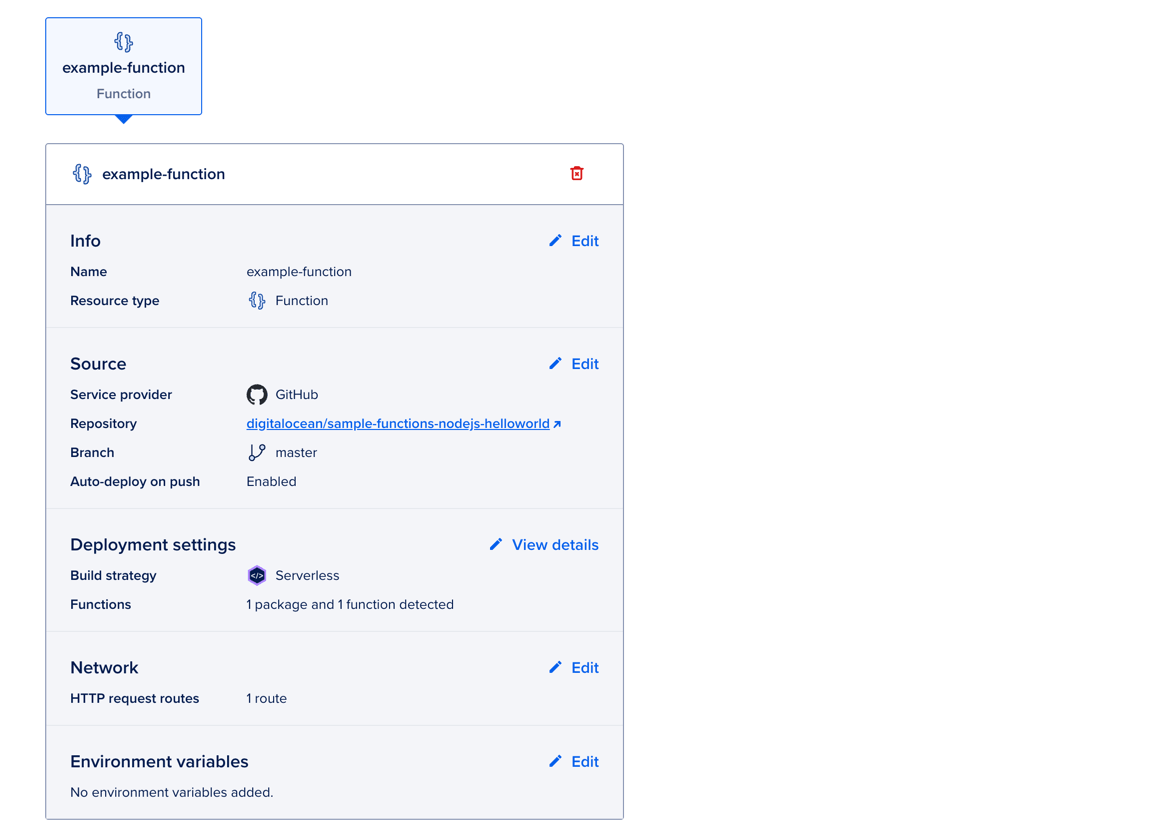
You can configure the following settings:
-
Name: A unique name for the component.
-
Branch: The branch to deploy from. You can enable automatic redeploys when changes are made to this branch.
-
HTTP request routes: For web services and static sites only. The URL path where the app can be accessed, such as
your-app-v3cl4.ondigitalocean.app/api. If not specified, the app is accessible from the provided hostname’s root. -
Environment variables: Key-value pairs available to your app at runtime that let you keep configuration separate from application code. Use them to provide secrets, API keys, and other external settings, such as connection details for an external database.
See the Templating section of the Functions project configuration documentation for examples and more information on configuring App Platform environment variables in project.yml. In addition, see How to Use Environment Variables in App Platform.
Set App-Level Environment Variables
App-level environment variables are available to all components in your app. Use them for shared configuration, secrets, API keys, or other values your app needs at build time or runtime.
To set app-level environment variables:
- Click Edit in the App-level environment variables section.
- Click Add environment variable, type a key and value, then select a scope.
- Select Encrypt to obscure the value in build, deployment, and application logs.
For dynamic, app-specific variables that your app can reference, see Use Bindable Variables.
Review and Deploy
Review the configuration and pricing details in the Summary section, then click Add resources.
App Platform creates the component with the selected settings and deploys it automatically. You can view or update the component’s configuration on the Settings page.
Edit Functions
Go to the Apps page, select your app, then click the Settings tab. Select the Function you want to edit.
Click Edit beside a setting you want to change, then click Save.
Get Function URLs
A Functions component can contain multiple individual functions. To find the live URL of each function in a Functions component, click your app, click the Settings tab, and then click the Functions component you want to inspect.
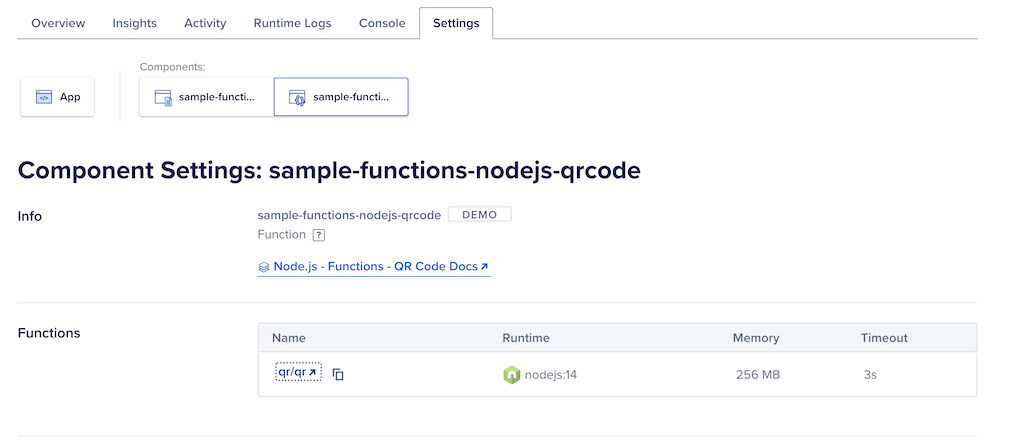
The Functions table lists each function deployed within the component. The Name of each function is a clickable link that opens the function’s URL in a new window in your browser.
Opening the live URL of a function directly in your browser can result in errors if your function is expecting input parameters. Use API testing tools like Postman, curl, or your programming language’s HTTP client library to test the URL with properly formatted HTTP requests.
Enable Trusted Sources
Functions in App Platform support trusted sources with DigitalOcean Managed Databases. You can add your app as a trusted source on a managed database cluster to enable a secure connection from the app to the database cluster.
When you add an app as a trusted source for a database, all components of the app, including any functions, have secure access to the database cluster.
When you remove an App Platform app from your database’s trusted sources, the app’s functions remain trusted until the entire app is redeployed. You must redeploy your app to fully remove access.
To configure the functions component to connect to the database cluster, set environment variables and set each value to the bindable variable for your database component (for example, ${db.DATABASE_URL} or ${postgres-db.DATABASE_URL} if your database is named postgres-db), not a literal connection string:
DATABASE_URLfor the connection URL (for example,${db.DATABASE_URL}).DATABASE_PASSWORDfor the password (for example,${db.PASSWORD}).DATABASE_USERfor the username to use to connect (for example,${db.USERNAME}).DATABASE_NAMEfor the name of the database cluster (for example,${db.DATABASE}).
When using functions to connect to database clusters, reuse the connection across multiple invocations, or close it after each invocation to avoid exceeding the cluster’s connection limit. The function runtime may be reused between invocations, so you can initialize the connection in a persistent global variable.
Trusted sources are not currently supported with MongoDB or Postgres connection pools.
Log Forwarding
Functions components in App Platform can forward console and error logs to a logging provider. You can choose DigitalOcean’s Managed OpenSearch, or the third-party services Logtail and Datadog:
We do not currently support Papertrail as a log forwarding provider for Functions components.
Enabling log forwarding requires two steps:
- Configure a log forwarding destination.
- Update your function’s
project.ymlfile to handle theLOG_DESTINATIONSenvironment variable.
Configure a Log Forwarding Destination
You can configure a log forwarding destination using either the Control Panel or by updating your app spec.
Go to the Apps page and select your app. Click the Settings tab, then click the Functions component.
In the Log Forwarding section, click Edit, then choose a log forwarding service, either Managed OpenSearch, Datadog, or Logtail.
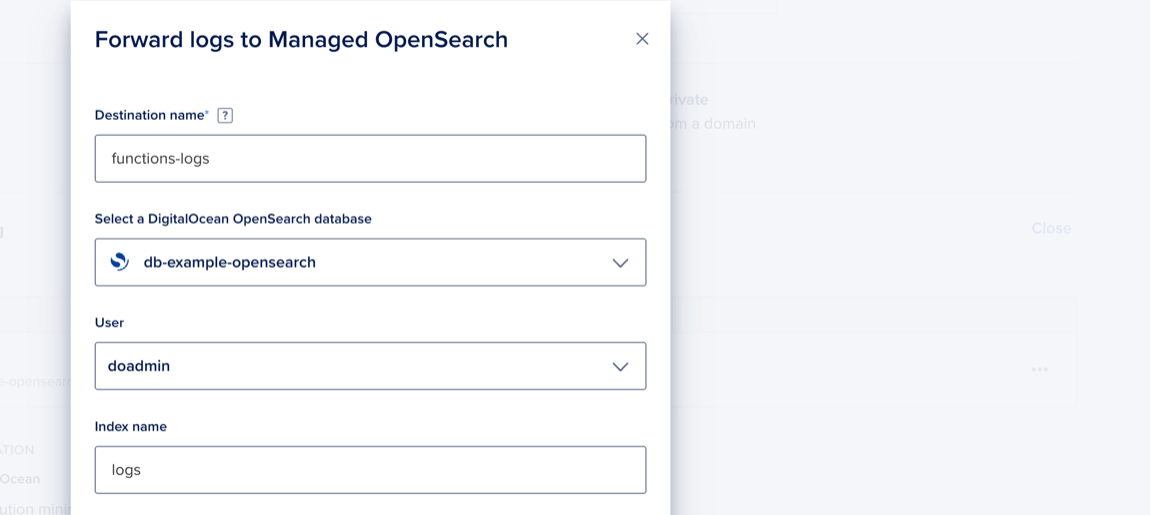
- For Managed OpenSearch, enter a destination name, select a database, then select a user. Optionally update the default index name. Then click Add Log Destination.
-
For Datadog, enter a destination name, an endpoint, and an API key. Then click Add Log Destination.
-
For Logtail, create an HTTP source (for example,
platform: http). Enter the resulting token and a destination name, then click Add Log Destination.
You can add log forwarding destinations to functions by updating the app spec. See the log_destinations section of the App Spec reference for details. Here is an example Logtail destination:
log_destinations:
- name: <example-destination>
  logtail:
    token: <your-token>
Place the log forwarding destination in the portion of your app spec that configures the function you’re enabling log forwarding for.
In the same component section, add the following environment variable:
  envs:
  - key: LOG_DESTINATIONS
    scope: RUN_AND_BUILD_TIME
    value: ${_self.FUNCTIONS_LOG_DESTINATION_JSON}
App Platform provides the value of ${_self.FUNCTIONS_LOG_DESTINATION_JSON}, which is a JSON structure with configuration details for log forwarding destinations.
Adding a log forwarding destination to a Functions component also creates an environment variable with the key LOG_DESTINATIONS. You can view this variable on the Settings page in the Environment Variables section. Removing this environment variable stops log forwarding from working.
Update Your project.yml File
To complete the setup, add the LOG_DESTINATIONS environment variable to your function’s project.yml file:
environment:
  LOG_DESTINATIONS: ${LOG_DESTINATIONS}
This passes the component-level LOG_DESTINATIONS environment variable to the Functions process. After updating project.yml, redeploy your Functions component.
Destroy Functions
Go to the Apps page, select your app, then click the Settings tab. Select the Function you want to destroy.
At the bottom of the page, click Destroy Component. Enter the Function’s name to confirm, then click Destroy.
Function Limits
All Functions product limits also apply to Functions components in App Platform. See the following link for details.
Functions Limits
Limits and known issues for DigitalOcean Functions.