This feature is in public preview. To use it, opt in from the Feature Preview page.
How to Build, Test, and Deploy Agents Using Agent Development Kitpublic
Last verified 29 Jun 2026
Inference provides a single control plane for managing inference workflows. It includes a Model Catalog where you can view available foundation models, including both DigitalOcean-hosted and third-party commercial models, compare model capabilities and pricing, use routing to match inference requests to the best-fit model, and run inference using serverless or dedicated deployments.
Overview
The Agent Development Kit (ADK) is a Python SDK and CLI that lets you deploy agent code as a hosted, production-ready service. You can build your agent using the tools and frameworks of your choice, and then use the ADK to deploy it on real infrastructure. You can also add knowledge bases to your agent to give the agent access to custom data and view logs.
Using the ADK, you can build a variety of agents including:
-
Document Q&A Agents: You can upload PDFs, and then ask questions to the agent.
-
Research Agents: Search the web, and summarize the findings.
-
Multi-Agent Systems: Teams of agents working together to achieve a common goal.
-
Custom Chat Agents: Any conversational AI agent.
If you want to use the DigitalOcean Control Panel, CLI, or API instead to create agents, see How to Create Agents.
When to Build Agents Using the ADK Versus the Control Panel, CLI, or API
Use the ADK or the DigitalOcean Control Panel, CLI, or API based on your use case and requirements.
| Build Agents Using ADK | Build Agents Using Control Panel, CLI, or API |
|---|---|
Use the ADK to deploy custom agent code as a hosted, production-ready service. Choose the ADK when you:
|
Use the DigitalOcean Control Panel UI, CLI, or API to build simple Retrieval-Augmented Generation (RAG) agents without managing code. Choose these interfaces when you:
|
Understanding Entrypoint
The entrypoint tells the ADK runtime how to host your agent code and is called when you invoke your agent. Your agent code must have an entrypoint function that starts with the @entrypoint decorator.
The entrypoint function requires two parameters:
-
payloadis the first parameter for the payload. -
contextis the second parameter for runtime-provided context.
The function can look similar to the following:
@entrypoint
def entry(payload, context):
   query = payload["prompt"]
   inputs = {"messages": [HumanMessage(content=query)]}
   result = workflow.invoke(inputs)
   return result
The content of the payload is determined by the agent. In this example, the agent requires the payload in the JSON body of the POST request to contain a prompt field. For more examples, see Example Agents.
Prerequisites
You must have the following to use the ADK:
-
Python version 3.10 or higher. Run
python --versionorpython3 --versionto check your Python version.If your version is not 3.10 or higher, you can install it using one of these methods:
-
Download from python.org.
-
Run one of the following commands in your command line terminal:
-
pyenv install 3.13.0 && pyenv local 3.13.0 -
conda create -n gradient python=3.13 && conda activate gradient
-
-
ADK Feature Preview enabled. You can opt in from the Feature Preview page. If you can’t see the option, contact your team owner to enable it for you.
-
API Access Keys. You need the following keys to use the ADK:
- Model access key to authenticate access to open-source and commercial models for serverless inference.
Go to Serverless Inference in the control panel and scroll down to the Model Access Keys section. Click Create Access Key or copy an existing one.
Add the model access key as the
MODEL_ACCESS_KEYenvironment variable to the.envfile.For running or testing your agent locally, you must also export the key so that it is accessible to the application. To do this, run the following command:
```bash export MODEL_ACCESS_KEY="<your_model_key>" ```- Your account’s personal access token to allow deploying agents to your DigitalOcean account.
Go to the API Tokens page in the control panel and click Generate New Token. Configure the following CRUD scopes:
- Create, read, update, delete scopes for
genai - Read scope for
project
Provide a descriptive name for your token such as
ADK - Production.Add the API key as the
DIGITALOCEAN_API_TOKENenvironment variable to the.envfile. -
An
.envfile with environment variables to use in agent deployment. Use the following command to create the.envfile and add the model access key,MODEL_ACCESS_KEY, and your account’s personal access token,DIGITALOCEAN_API_TOKEN, environment variables to enable agent deployment to your DigitalOcean account:cat > .env << EOF MODEL_ACCESS_KEY=<your_model_key> DIGITALOCEAN_API_TOKEN=<your_api_token> EOFWarning Do not commit the
.envfile to Git. Make sure to add it to your.gitignorefile. -
A
requirements.txtfile at the root of the folder or repo to deploy, listing your dependencies.
Install ADK
To start building an agent using the ADK, you must first install the gradient-adk package using pip:
pip install gradient-adkInstalling the gradient-adk package automatically gives you access to the gradient CLI.
Verify that the installation was successful by checking the version:
gradient --versionThe output looks like the following:
gradient, version x.x.xBuild Your First Agent
-
Initialize a new agent project using the following command:
gradient agent initWhen prompted, specify an agent workspace name and an agent deployment name. For example,
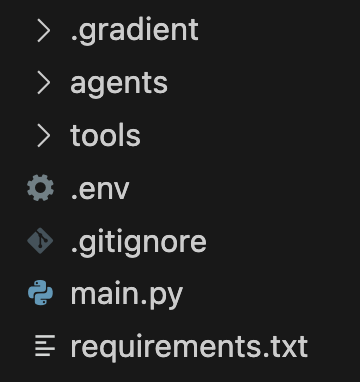
my-first-agentanddevelopment.When you run this command, the following directory structure is created:
my-agent/
├── main.py              # Your entrypoint (modify this!)
├── .gradient/
│   └── agent.yml        # Config (don't edit manually)
├── requirements.txt     # Python packages (add dependencies here)
├── .env                 # API keys (YOU create this)
├── agents/              # Your agent code (optional)
└── tools/               # Custom tools (optional)
To provide an easy way for you to create an agent, the command also:
- Creates a base template (
main.py) for a simple LangGraph example agent that calls aopenai-gpt-oss-120bmodel using serverless inference - Creates a configuration file (
agents.yml) required to run or deploy your agent - Installs all necessary dependencies for agent development
- Creates a base template (
-
Run and test the example agent locally using the following command:
gradient agent runThe output looks like this:
Entrypoint: main.py
Server: http://0.0.0.0:8080
Agent: my-first-agent
Entrypoint endpoint: http://0.0.0.0:8080/run
You can then access the agent and interact with it at the
http://0.0.0.0:8080/runendpoint.To interact with the agent, send a
POSTrequest to this endpoint with a prompt in the request body. For example, your request body can be'{"prompt": "How are you?"}':curl -X POST http://localhost:8080/run \ -H "Content-Type: application/json" \ -d '{"prompt": "Hello! How are you?"}'Your agent processes the request and returns a response:
{
  "response": "Hello! I'm doing well, thank you for asking. How can I help you today?"
}
To view more verbose logs, use:
gradient agent run --verbose -
Once you verify that your agent is working correctly locally, deploy it to your DigitalOcean account using the following commands:
export DIGITALOCEAN_API_TOKEN="<your_api-token>"
gradient agent deploy
The deployment takes between 1 to 5 minutes. After the deployment succeeds, you see a
Deployment completed successfullymessage and the deployment URL that the agent is running on in your terminal.✅ Deployment completed successfully! [01:23] Agent deployed successfully! (my-first-agent/development) Deployment URL: https://agents.do-ai.run/v1/abc123-xxxx-xxxx/development/run -
Test the deployed agent by sending a
POSTrequest with a prompt in the request body to the deployment endpoint URL. For example, the request body can be'{"prompt": "hello"}:curl -X POST \ -H "Authorization: Bearer $DIGITALOCEAN_API_TOKEN" \ -H "Content-Type: application/json" \ "https://agents.do-ai.run/v1/abc123-xxxx-xxxx/development/run" \ -d '{"prompt": "Hello deployed agent!"}'Your agent deployment processes the request and returns a response:
{
  "response": "Hello! How can I assist you today?"
}
Set Up a Project
To build new agents, you can either use a project for an existing agent or initialize a new project.
If you have an existing agent, you can bring it on DigitalOcean Inference using the ADK.
First, navigate to that agent folder and review the requirements.txt to verify that the ADK is installed. The requirements.txt must have the gradient-adk and gradient lines listed as dependencies.
Then, import the entrypoint module from the ADK by adding from gradient_adk import entrypoint in your agent code. This module lets you create an @entrypoint decorator and enables you to add an entrypoint function in your agent code. For example, in an existing LangGraph agent code, you can add the following import statement at the top of your main.py file:
from langchain_core.messages import HumanMessage, AIMessage, ToolMessage, BaseMessage
from langgraph.graph import StateGraph, END
from langgraph.prebuilt import ToolNode, tools_condition
from gradient_adk import entrypoint
Finally, write your entrypoint function in the agent code. For more information about the entrypoint decorator, see entrypoint decorator.
Next, run the following command to create a Gradient configuration file:
gradient agent configureThe Gradient configuration file is required to run or deploy your agent. When prompted, enter the agent name, agent deployment name (such as production, staging, or beta), and the file your entrypoint lives in. For example, example-agent, staging, and main.py (if your agent code is in main.py), respectively. You see a Configuration complete message once the configuration completes. Next, run the agent locally.
You can initialize a new project for your agent. Navigate to the desired folder for your agent and run the following command:
gradient agent initTo provide an easy way for you to get started, the command creates folders and files (requirements.txt), sets up a base template for a simple LangGraph example agent that makes a call to a openai-gpt-oss-120b model using serverless inference(main.py), and sets up a Gradient configuration file which is required to run or deploy your agent.
When prompted, specify an agent workspace name and an agent deployment name. For example, staging, and example-agent, respectively.
After the project initialization is complete, your directory structure looks like the following:
Next, update main.py to implement your agent code.
Run and Test Agents Locally
To run an agent, use the following command:
gradient agent runThis starts up a local server on localhost:8080 and exposes an /run endpoint that you can use to interact with your agent.
You see the following output:
Entrypoint: main.py
Server: http://0.0.0.0:8080
Agent: example_agent
Entrypoint endpoint: http://0.0.0.0:8080/run
To invoke the agent, send a POST request to the /run endpoint using curl. For example:
curl -X POST http://localhost:8080/run
-H "Content-Type: application/json"
-d '{"prompt": "How are you?"}'
Your agent processes the request and returns a response, such as Hello! I am doing good, thank you for asking. How can I assist you today?.
To view more verbose local runtime output, use:
gradient agent run --verboseOnce you verify that your agent is working correctly, you can deploy it.
Deploy and Test Your Agent
Use the following command to deploy your agent:
gradient agent deployThis starts the build and deployment, which takes between 1 minute and 5 minutes. If your agent fails to build or deploy, see Troubleshoot Build or Deployment Failures.
After the deployment completes, you can see the deployment endpoint that the agent is running in your terminal. It includes the workspace identifier (b1689852-xxxx-xxxx-xxxx-xxxxxxxxxxxx) and deployment name (staging). For example:
✅ Deployment completed successfully! [01:20]
Agent deployed successfully! (example-agent/staging)
To invoke your deployed agent, send a POST request to https://agents.do-ai.run/b1689852-xxxx-xxxx-8c68-dce069403e97/v1/staging/run with your properly formatted payload.
To invoke your deployed agent and verify that it is running correctly, send a POST request to the deployment endpoint, passing the prompt in the request JSON body. For example:
curl -X POST \
  -H "Authorization: Bearer $DIGITALOCEAN_TOKEN" \
  -H "Content-Type: application/json" \
  "https://agents.do-ai.run/v1/b1689852-xxxx-xxxx-8c68-dce069403e97/staging/run" \
  -d '{"prompt": "hello"}'
The agent processes your request and returns a response, such as "Hello! How can I assist you today?.
Deploying the agent also creates a new workspace in the DigitalOcean Control Panel. The workspace is named the workspace name you specified previously and labeled Managed by ADK. Here you can view and perform actions on agent deployments.
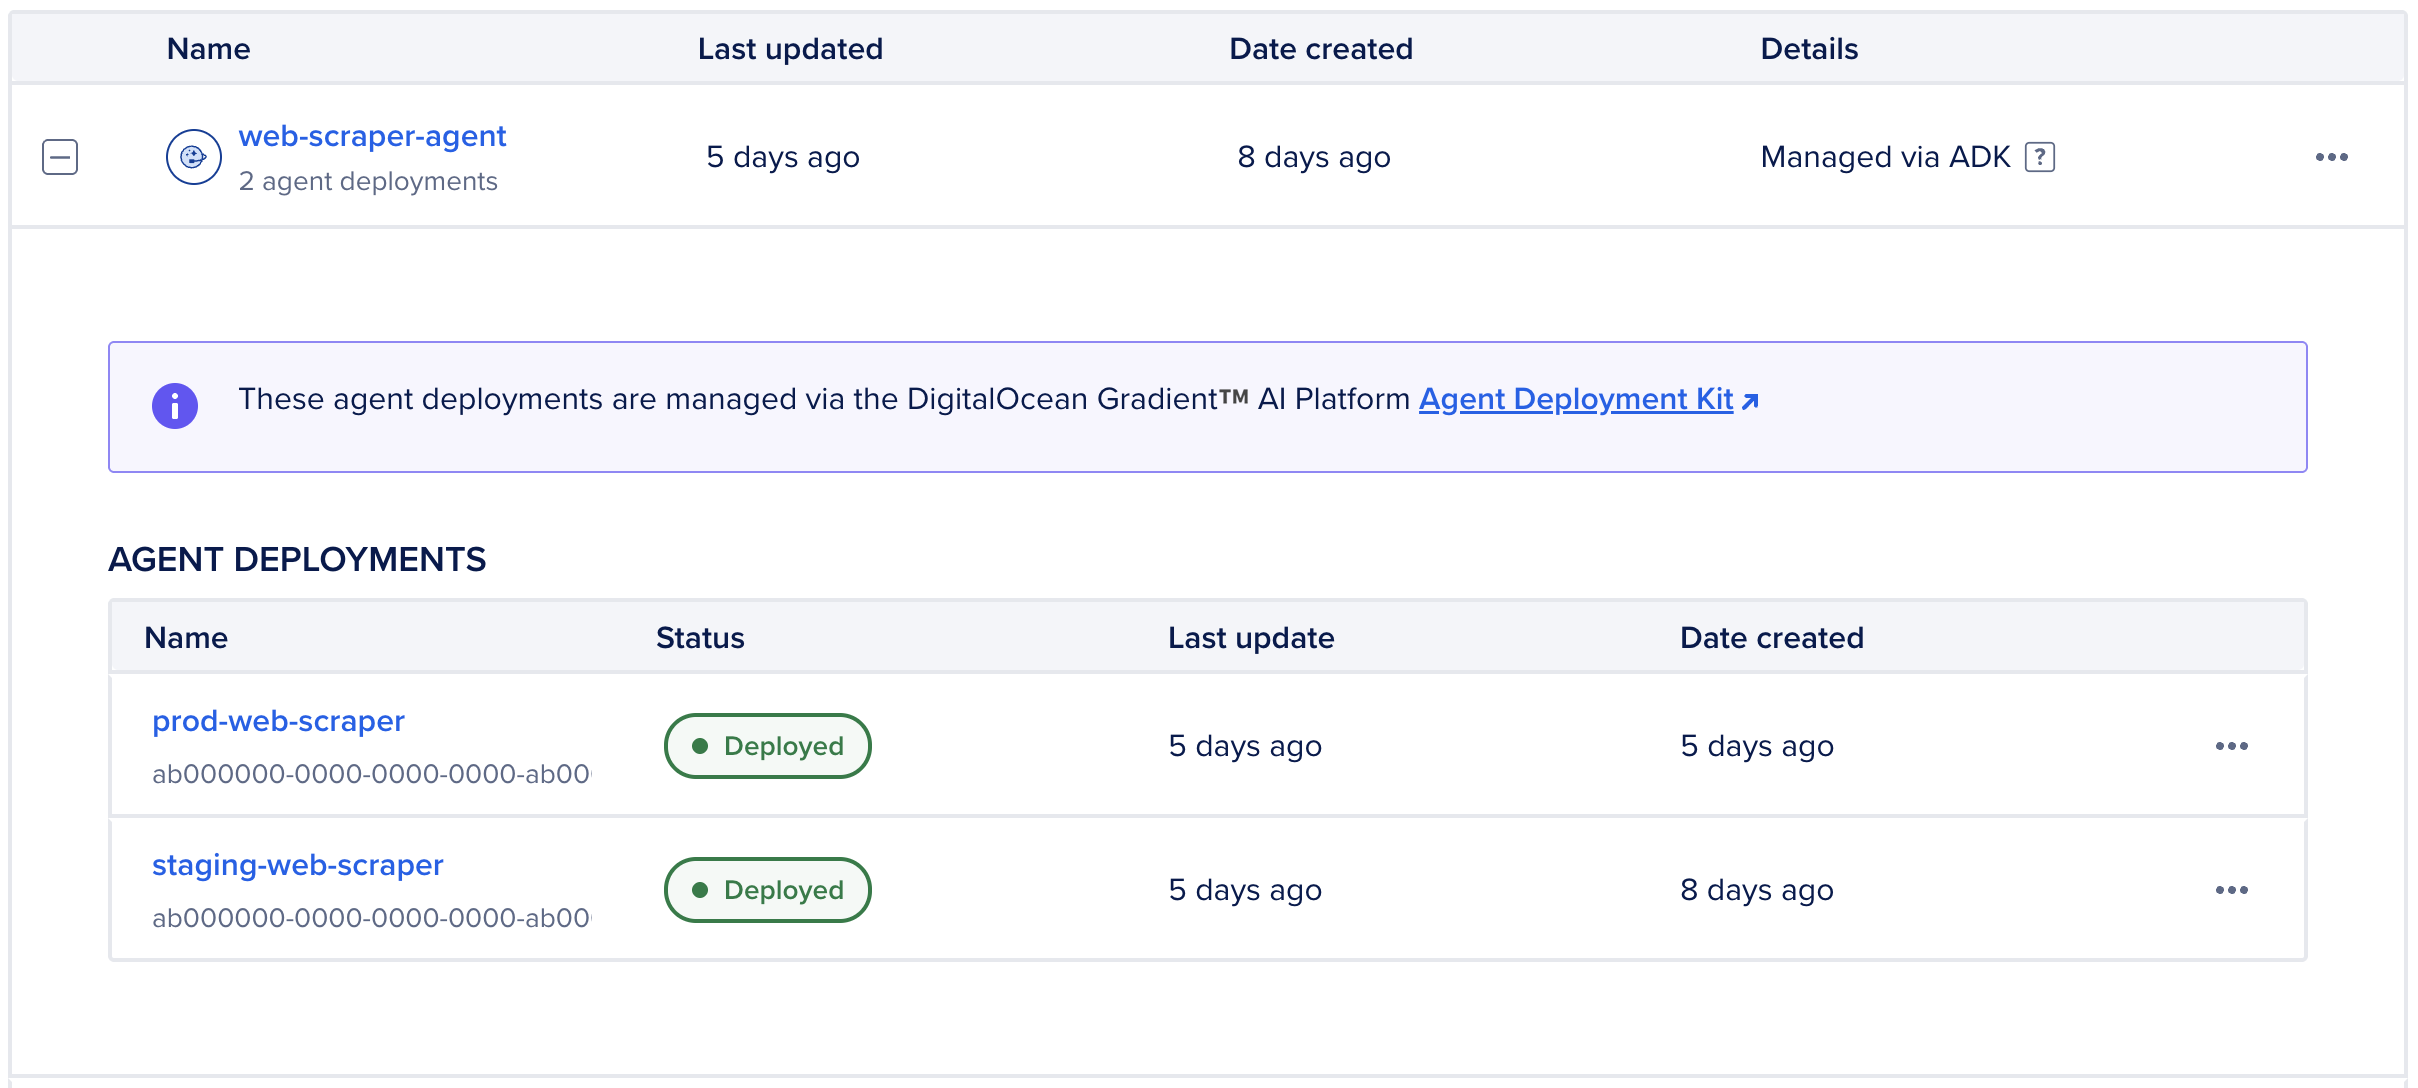
Agent deployments only include deployment timestamps and statuses, and have releases instead of versions. Automated rollback to a previous version is not available. To revert to a previous release of an agent deployment, you can re-deploy the agent code for that release to your environment.
View Agent Deployments in the DigitalOcean Control Panel
Agent deployments are organized in workspaces labeled Managed by ADK. These workspaces group agent deployments by development environments, such as production, staging, or test. However, you cannot move agent deployments from one workspace to another. To use the agent in another workspace, you must redeploy it to that workspace with the environment defined.
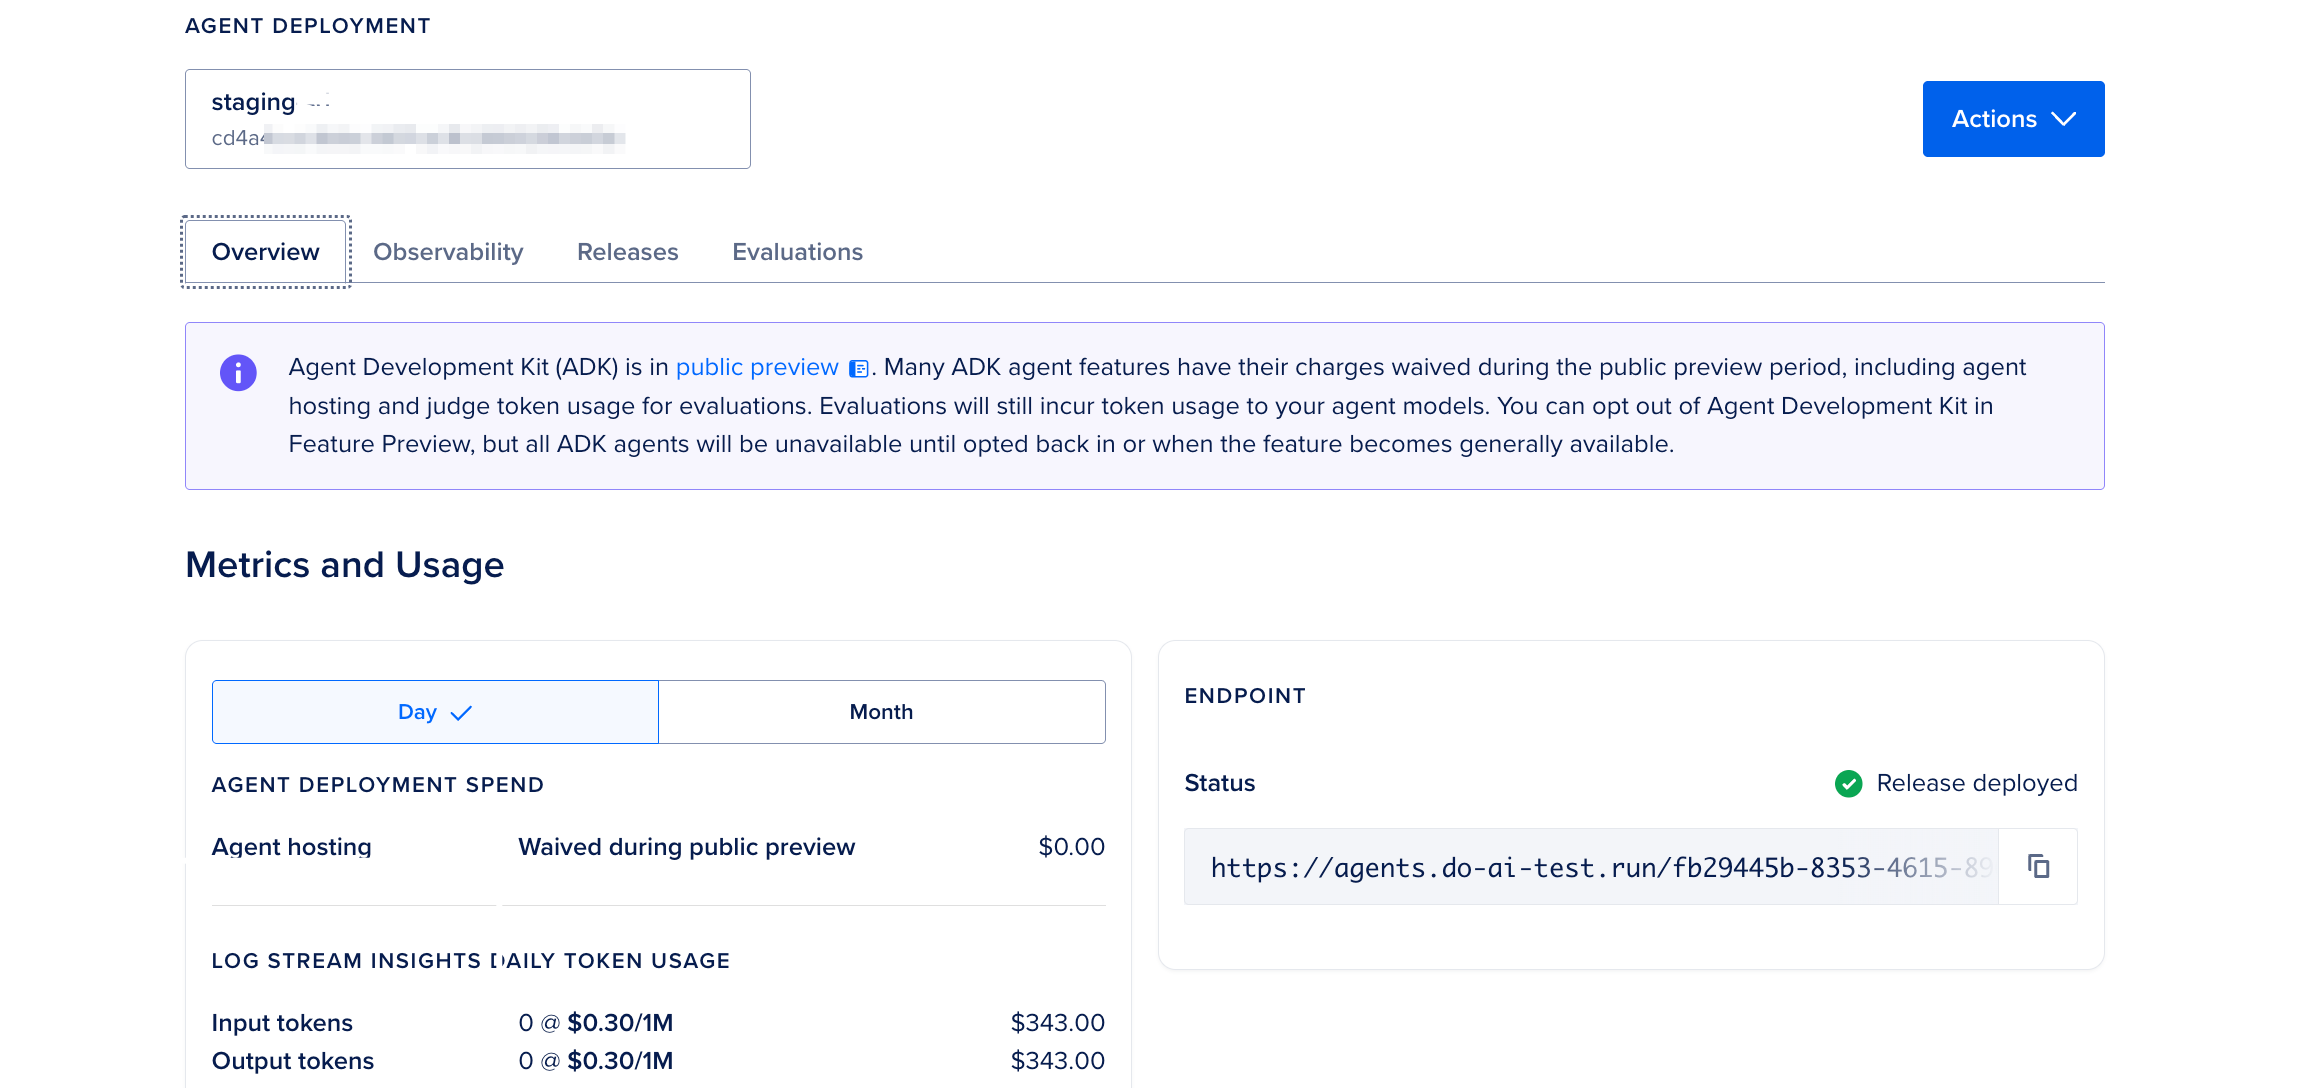
To view agent deployments, in the left menu of the control panel, click Agent Platform under INFERENCE. In the Workspaces tab, click + to expand the workspace that has your agent deployment. Then, select an agent deployment to open its Overview page.
You can perform the following actions in the control panel for your ADK-managed agent deployment:
-
View logs for the deployment in the Observability tab.
-
View the current and past agent deployments in the Releases tab. The release information includes the deployment timestamps and statuses.
Monitor Your Agent Using Logs
Logs show you what the server is doing, like a diary of server events. Logs capture events including server start, requests received, prompts processed, responses sent, and errors. For example, logs may look like the following:
2026-01-21 10:30:01 [INFO] Server started on 0.0.0.0:8080
2026-01-21 10:30:15 [INFO] Received POST /run
2026-01-21 10:30:15 [INFO] Processing prompt: "Hello"
2026-01-21 10:30:16 [INFO] Response sent: 200 OK
2026-01-21 10:30:45 [ERROR] Failed to connect to weather API
2026-01-21 10:30:45 [ERROR] Traceback: ...
Logs are useful to see server errors, debug deployment issues, monitor server health, and track request patterns.
View Logs for Your Agent
You can view the agent’s recent logs using:
gradient agent logsYou can also view the logs in the control panel.
Add Custom Logging
You can add your own log messages to the agent code to help debug your agent. We provide the following logging levels:
logger.debug("Detailed debugging info")      # Only in verbose mode
logger.info("General information")           # Normal operations
logger.warning("Something unusual happened") # Warnings
logger.error("An error occurred")            # Errors
logger.critical("Critical failure!")         # Critical issues
The following example shows how to add basic custom logging to your agent code:
import logging
from gradient_adk import entrypoint

# Set up logger
logger = logging.getLogger(__name__)

@entrypoint
async def main(input: dict, context: dict):
    """Agent with custom logging."""

    # Log the incoming request
    logger.info(f"Received request: {input['prompt']}")

    try:
        # Process
        result = await process(input["prompt"])

        # Log success
        logger.info(f"Successfully processed request")

        return {"response": result}

    except Exception as e:
        # Log error with full traceback
        logger.error(f"Error processing request: {e}", exc_info=True)
        raise
Use ADK Agents After Updating to Another Model
If you change the foundation model at any time, you must take the following steps:
-
Update the model ID in your CLI/API calls, serverless inference requests, and ADK code: Update the model ID parameter in your code to the new model ID.
-
Review prompt logic: While new models are largely backward compatible, we recommend reviewing your system prompts, as the new model follows instructions more precisely. You may need to adjust your prompts to get the desired response format.
-
Test agent: Run parallel tests to validate output consistency before the retirement date in the staging environment.
Use ADK With Different Frameworks
The ADK works with any Python AI framework. To use an existing framework with the ADK, wrap your agent logic in an @entrypoint function and return the response from that function.
The following examples show how to use the ADK with different frameworks.
Use LangGraph to define graph-based agent workflows with nodes, tools, and conditional routing.
from typing import TypedDict, List
from gradient_adk import entrypoint
from langchain_core.messages import HumanMessage, AIMessage
from langchain_core.tools import tool
from langgraph.graph import StateGraph, END
from langgraph.prebuilt import ToolNode, tools_condition

class State(TypedDict):
    messages: List[HumanMessage | AIMessage]

@tool
def calculator(expression: str) -> str:
    """Calculate a math expression."""
    return str(eval(expression))

@tool
def web_search(query: str) -> str:
    """Search the web."""
    # Your search logic
    return "Search results..."

tools = [calculator, web_search]

# Define nodes
async def agent_node(state: State):
    """Decide what to do next."""
    response = await llm_with_tools.ainvoke(state["messages"])
    return {"messages": state["messages"] + [response]}

# Build graph with tools
graph = StateGraph(State)
graph.add_node("agent", agent_node)
graph.add_node("tools", ToolNode(tools))

# Add routing
graph.set_entry_point("agent")
graph.add_conditional_edges(
    "agent",
    tools_condition,
    {"tools": "tools", END: END}
)
graph.add_edge("tools", "agent")

workflow = graph.compile()

@entrypoint
async def main(input: dict, context: dict):
    result = await workflow.ainvoke({
        "messages": [HumanMessage(content=input["prompt"])]
    })
return {"response": result["messages"][-1].content}Use LangChain to compose prompts, models, retrievers, and chains inside an ADK entrypoint.
from gradient_adk import entrypoint
from langchain_openai import ChatOpenAI
from langchain_core.prompts import ChatPromptTemplate

# Set up LLM
llm = ChatOpenAI(temperature=0)

async def search_documents(query: str):
    """Search for relevant documents."""
    # Your vector search logic
    docs = await vectorstore.asimilarity_search(query, k=3)
    return "\n".join([doc.page_content for doc in docs])

async def generate_answer(question: str, context: str):
    """Generate answer from context."""
    prompt = ChatPromptTemplate.from_template(
        "Context: {context}\n\nQuestion: {question}\n\nAnswer:"
    )
    chain = prompt | llm
    response = await chain.ainvoke({
        "context": context,
        "question": question
    })
    return response.content

@entrypoint
async def main(input: dict, context: dict):
    """RAG agent using LangChain."""
    question = input["prompt"]

    # Step 1: Search documents (traced)
    relevant_docs = await search_documents(question)

    # Step 2: Generate answer (traced)
    answer = await generate_answer(question, relevant_docs)

return {"response": answer}Use CrewAI to coordinate agents and tasks, then expose the workflow through an ADK entrypoint.
from gradient_adk import entrypoint
from crewai import Agent, Task, Crew

def run_research(topic: str):
    """Run research crew."""
    # Create researcher
    researcher = Agent(
        role='Senior Researcher',
        goal=f'Research {topic} thoroughly',
        backstory='Expert at finding and analyzing information',
        verbose=True
    )

    # Create task
    research_task = Task(
        description=f'Research everything about {topic}',
        agent=researcher,
        expected_output='Comprehensive research report'
    )

    # Run crew
    crew = Crew(
        agents=[researcher],
        tasks=[research_task],
        verbose=True
    )

    result = crew.kickoff()
    return result

def run_writer(research: str):
    """Run writing crew."""
    writer = Agent(
        role='Content Writer',
        goal='Write engaging articles',
        backstory='Professional writer',
        verbose=True
    )

    write_task = Task(
        description=f'Write article based on: {research}',
        agent=writer,
        expected_output='Well-written article'
    )

    crew = Crew(agents=[writer], tasks=[write_task])
    return crew.kickoff()

@entrypoint
async def main(input: dict, context: dict):
    """Multi-agent crew system."""
    topic = input["prompt"]

    # Research phase
    research = run_research(topic)

    # Writing phase
    article = run_writer(research)

return {"response": article}Use the ADK with a custom Python agent by defining your agent logic and exposing it through an @entrypoint function.
from gradient_adk import entrypoint

class MyCustomAgent:
    """Your custom agent."""

    async def search_memory(self, query: str):
        """Search conversation memory."""
        # Your memory search logic
        return ["relevant", "memories"]

    async def calculate(self, expression: str):
        """Perform calculation."""
        try:
            result = eval(expression)
            return {"success": True, "result": result}
        except Exception as e:
            return {"success": False, "error": str(e)}

    async def think(self, prompt: str, context: list):
        """Reasoning step."""
        full_prompt = f"Context: {context}\n\nTask: {prompt}"
        response = await your_llm_api.generate(full_prompt)
        return response
    async def respond(self, reasoning: str):
        """Generate final response."""
        response = await your_llm_api.generate(
            f"Based on: {reasoning}\n\nGenerate friendly response:"
        )
        return response

    async def process(self, user_input: str):
        """Main processing logic."""
        # Step 1: Search memory
        memories = await self.search_memory(user_input)

        # Step 2: Use tools if needed
        if "calculate" in user_input.lower():
            calc_result = await self.calculate("2 + 2")
            memories.append(f"Calculation: {calc_result}")

        # Step 3: Think
        reasoning = await self.think(user_input, memories)

        # Step 4: Respond
        final_response = await self.respond(reasoning)

        return final_response

# Initialize agent
agent = MyCustomAgent()

@entrypoint
async def main(input: dict, context: dict):
    """Custom agent entrypoint."""
    response = await agent.process(input["prompt"])
    return {"response": response}
Example Agents
The following examples show how to connect your ADK agent to Knowledge Bases for RAG and a LangGraph RAG agent using the ADK.
Enable Enhanced Knowledge Base Feature
Enhancements to knowledge bases such as new chunking options and an endpoint for retrieval are in public preview. You can opt in the Knowledge Base Enhancements from the Feature Preview page.
Add Knowledge Base Identifier As Environment Variable
To add your knowledge base to your agent, you first need the identifier of the knowledge base. To get your knowledge base UUID from the DigitalOcean Control Panel, navigate to the Knowledge bases tab in the control panel. Copy the UUID from the URL your browser:
https://cloud.digitalocean.com/agent-platform/knowledge-bases/{UUID}Alternatively, send the following request to get your knowledge base UUID:
curl -X GET https://api.digitalocean.com/v2/genai/knowledge_bases \
  -H "Authorization: Bearer $DIGITALOCEAN_API_TOKEN"
The response includes the UUIDs of all your knowledge bases:
{
  "knowledge_bases": [
    {
      "id": "kb-abc123-xxxx-xxxx",
      "name": "My Knowledge Base",
      "created_at": "2026-01-20T10:00:00Z"
    }
  ]
}
Next, add the UUID to your .env file:
# Add to your .env file
DIGITALOCEAN_KB_UUID=<your_knowledge_base_uuid>
Build Agent with Knowledge Base
from gradient_adk import entrypoint
from gradient import Gradient
import os

client = Gradient()

@entrypoint
async def main(input: dict, context: dict):
    """
    Simple RAG agent using Knowledge Base.
    """
    query = input.get("prompt", "")

    # Step 1: Retrieve relevant documents
    response = client.retrieve.documents(
        knowledge_base_id=os.environ.get("DIGITALOCEAN_KB_UUID"),
        num_results=5,
        query=query,
    )

    # Step 2: Extract content from results
    context_docs = []
    if response and response.results:
        context_docs = [result.content for result in response.results]

    # Step 3: Generate answer with context
    context_text = "\n\n".join(context_docs)
    prompt = f"Context:\n{context_text}\n\nQuestion: {query}\n\nAnswer:"

    # Your LLM call here
    answer = await your_llm.generate(prompt)

    return {
        "response": answer,
        "sources": len(context_docs)
}from gradient_adk import entrypoint
from langgraph.graph import StateGraph, END
from langgraph.prebuilt import ToolNode, tools_condition
from langchain_core.messages import HumanMessage, AIMessage
from langchain_core.tools import tool
from typing import TypedDict, List
from gradient import Gradient
import os
# Initialize client
client = Gradient()
# Define Knowledge Base tool
@tool
def query_digitalocean_kb(query: str, num_results: int = 5) -> str:
"""
Search the DigitalOcean Knowledge Base for relevant documentation.
Use this when you need specific information from our knowledge base.
"""
response = client.retrieve.documents(
knowledge_base_id=os.environ.get("DIGITALOCEAN_KB_UUID"),
num_results=num_results,
query=query,
)
if response and response.results:
# Format results as text
formatted_results = []
for i, result in enumerate(response.results, 1):
formatted_results.append(
f"Result {i} (Score: {result.score:.2f}):\n{result.content}"
)
return "\n\n".join(formatted_results)
return "No relevant information found in the knowledge base."
# Define state
class State(TypedDict):
messages: List[HumanMessage | AIMessage]
# Create tools list
tools = [query_digitalocean_kb]
# Define agent node
async def agent_node(state: State):
"""Agent decides what to do next."""
messages = state["messages"]
response = await llm_with_tools.ainvoke(messages)
return {"messages": messages + [response]}
# Build the graph
graph = StateGraph(State)
graph.add_node("agent", agent_node)
graph.add_node("tools", ToolNode(tools))
# Set up routing
graph.set_entry_point("agent")
graph.add_conditional_edges(
"agent",
tools_condition,
{
"tools": "tools",
END: END
}
)
graph.add_edge("tools", "agent")
# Compile workflow
workflow = graph.compile()
@entrypoint
async def main(input: dict, context: dict):
"""
RAG agent with LangGraph and Knowledge Base tool.
The agent will automatically use the Knowledge Base when needed.
"""
result = await workflow.ainvoke({
"messages": [HumanMessage(content=input["prompt"])]
})
return {"response": result["messages"][-1].content}Destroy an Agent Deployment
You can destroy an agent deployment only using the DigitalOcean Control Panel. To destroy an agent deployment from the control panel, in the left menu, click Agent Platform under INFERENCE. From the Workspaces tab, select the workspace that contains the agent you want to destroy and select the agent. Then, select Destroy agent deployment from the agent’s Actions menu. In the Destroy Agent Deployment window, type the agent’s name to confirm and then click Destroy.
Once all agent deployments within the workspace are destroyed, the workspace is also destroyed.
Best Practices
We recommend the following best practices for your deployment workflow when building agents using the ADK, improving agent latency, and improving agent accuracy.
Optimal Deployment Workflow
For your deployment workflow when building agents using the ADK:
-
Start with a template. Don’t start from scratch. Use one of the official agent templates.
-
Test the agent locally first by always running
gradient agent runbefore deploying. -
Use Git to version control your code.
-
Never commit the
.envfile to Git by adding it to.gitignore. -
Deploy the agent to staging first and test before you deploy to the production environment. For example:
gradient agent deploy --deployment staging  # Deploy to staging
# Test staging thoroughly
gradient agent deploy --deployment production  # Deploy to production
Improve Agent Latency
Choose the Right Model for the Right Use Case
LLMs are available with different parameters suited for a variety of use cases. It takes some experimentation to get the right balance of accuracy and latency for your use case. In general, if you want faster response times, choose non-reasoning models and smaller parameter models as these will return responses faster.
Stream Responses Back
Waiting for the entire response can add several seconds of latency. Streaming the final response is preferred. This lets the user using the agent to start seeing the response from the agent as soon as it starts responding. For example, the following code snippet shows how to stream responses back to the client using the ADK:
from gradient_adk import entrypoint
from gradient import AsyncGradient
from typing import Dict, AsyncGenerator
import os

async def call_model(prompt: str) -> AsyncGenerator[str, None]:
    """
    Stream tokens from Gradient and yield each chunk.
    """
    client = AsyncGradient(
        inference_endpoint="https://inference.do-ai.run",
        model_access_key=os.environ.get("MODEL_ACCESS_KEY"),
    )
    stream = await client.chat.completions.create(
        messages=[{"role": "user", "content": prompt}],
        model="openai-gpt-oss-120b",
        stream=True,
    )
    async for event in stream:
        delta = event.choices[0].delta.content
        if delta:
            yield delta

@entrypoint
async def main(input: Dict, context: Dict):
    """
    Streaming entrypoint.
    Every `yield` here is flushed to the client.
    """
    user_query = input.get("query", "")
    full_response_parts = []

    # Stream from LLM AND stream outward
    async for chunk in call_model(user_query):
        full_response_parts.append(chunk)
        yield chunk
Decrease the Number of Input Tokens to LLM Calls
Sending tens of thousands of tokens worth of context to a LLM call can produce more accurate responses but it comes at the cost of a slower response. LLMs take longer in general when given more input tokens.
There are several strategies you can take to lower the amount of input tokens including:
- Reranking and dropping of results from a knowledge base call
- Using a smaller, quicker LLM to compact and summarize content prior to sending to the final response generation LLM
Improve Agent Accuracy
There are several strategies you can use to improve your agent’s accuracy:
Choose Another Model
- Reasoning models come with a higher cost and longer response time but typically produce better results than non-reasoning models.
- In general, third party models like the ones from OpenAI and Anthropic produce higher quality results than open-source models at the tradeoff of a higher cost per token.
- You can create several ADK agents that are exactly the same except for using a different foundation model, and then compare their outputs with the same test prompts to determine which model produces the best results for your use case.
Give the Right Context to the LLMs
- Making a single call to a knowledge base or a web search tool may be the fastest way to retrieve information but it comes at a tradeoff of less context being sent to the LLM.
- Consider making multiple retrieval calls or using more sophisticated retrieval strategies to provide better context.
Troubleshoot Build or Deployment Failures
Builds or deployments can fail if you have issues. You receive one of the following error messages:
| Error Message | What It Means | How to Fix |
|---|---|---|
Python version mismatch |
Not using Python 3.13 | Install Python 3.10+: pyenv install 3.13.0 |
Missing requirements.txt |
No dependency file | Create file: echo "gradient-adk" > requirements.txt |
Port 8080 not exposed |
Entrypoint issue | Check @entrypoint decorator is present |
Missing .env file |
No environment variables | Create .env with your keys |
Authentication failed |
Wrong/missing API keys | Check keys in .env and verify they’re correct |
Incorrect token scopes |
Token lacks permissions | Regenerate token with all CRUD for genai + read for project |
Module not found: gradient_adk |
ADK not installed | Run pip install gradient-adk |
Module not found: X |
Missing dependency | Add to requirements.txt, run pip install -r requirements.txt |
Agent fails health check |
Code error in entrypoint | Test locally with gradient agent run --verbose |
Deployment timeout |
Too many/large dependencies | Optimize requirements.txt, remove unused packages |
Connection refused |
Server not running | Run gradient agent run first |
5xx error: invoking deployed agent |
Error in code | Run gradient agent logs to debug |
Check the Python version, the requirements.txt file, the entrypoint function defined, and all required environment variables in the .env file. Then, try building or deploying the agent again.
CLI Command Reference
| Task | Command |
|---|---|
| Project setup | gradient agent init: Create new project gradient agent configure: Configure existing project |
| Local development | gradient agent run: Run locally gradient agent run --verbose: View detailed logs |
| Agent deployment | gradient agent deploy: Deploy agent |
| Agent monitoring | gradient agent logs: View logs |
| Utilities | gradient --version: Check version gradient agent --help: Get help |